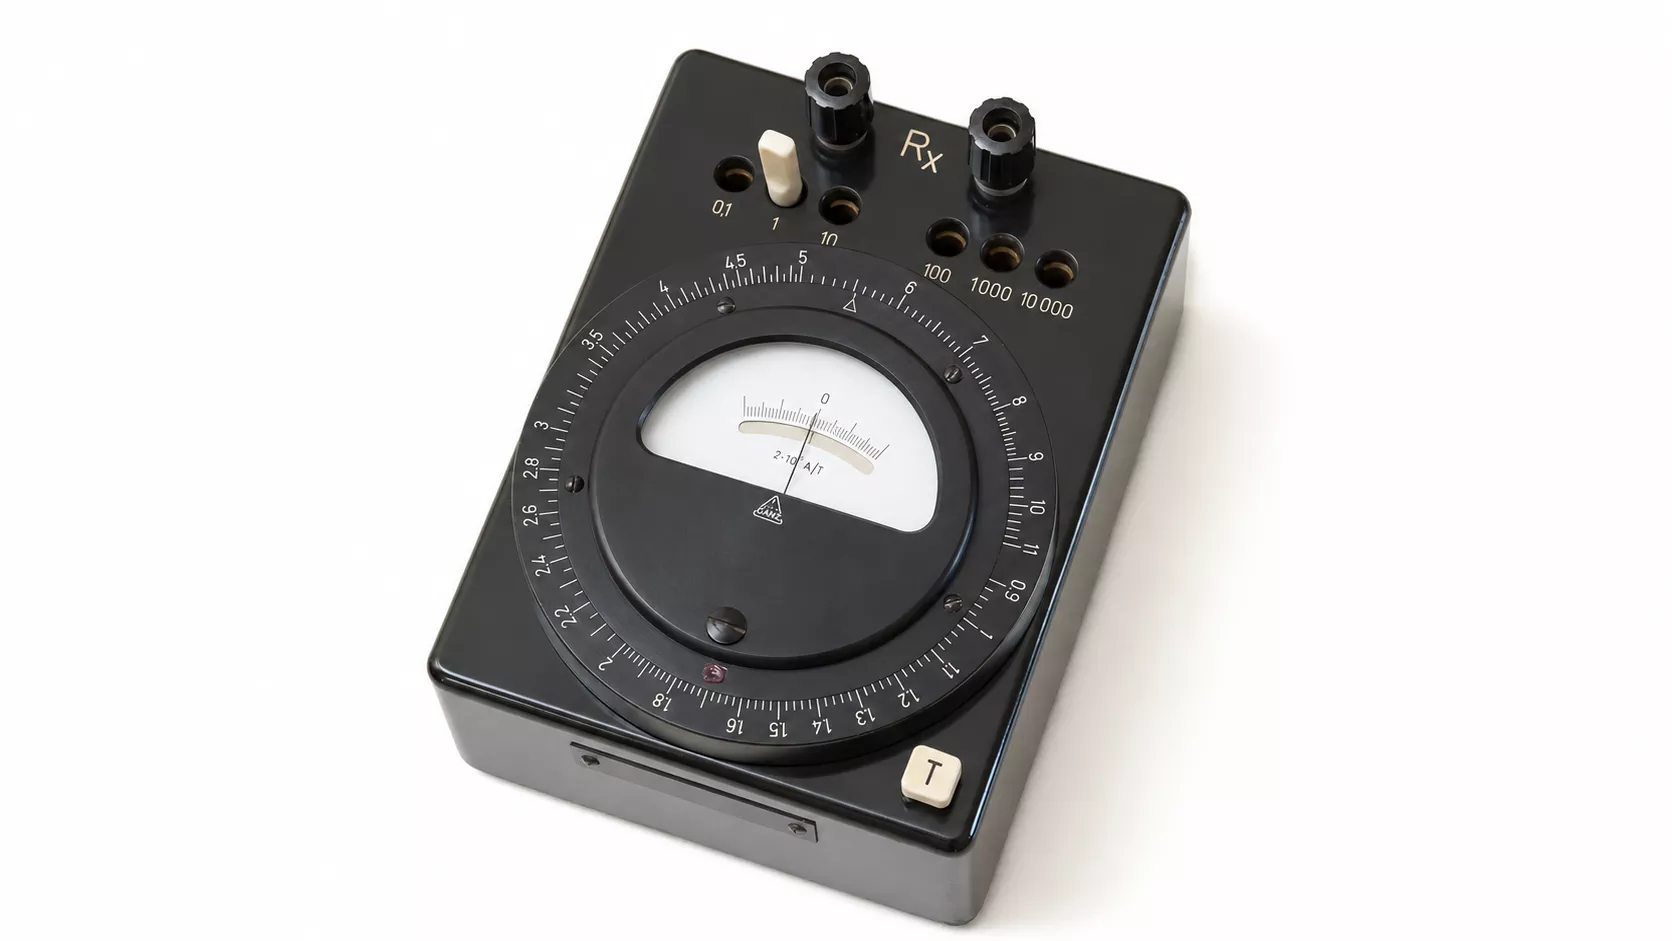
I found the Wheatstone bridge pictured here at a swap meet. It was missing the little white plug that fits into one of the sockets on top to select the measuring range, so I negotiated a lower price. I have since replaced the plug. But what exactly does this beauty do?
The Wheatstone bridge was invented by Samuel Hunter Christie in 1833, then refined and popularised by Sir Charles Wheatstone in 1843. It is used to measure resistance. This particular model, the Ganz XWH–1, has a measuring range of 0.09 Ω to 110 kΩ. Its compact size and low weight (120 × 160 × 65 mm, 0.9 kg), together with its ease of use, made it well suited to measurements in industrial settings. It was manufactured by Ganz Árammérőgyár in Gödöllő, Hungary, in the 1950s.
Using the instrument
The measurement procedure is straightforward:
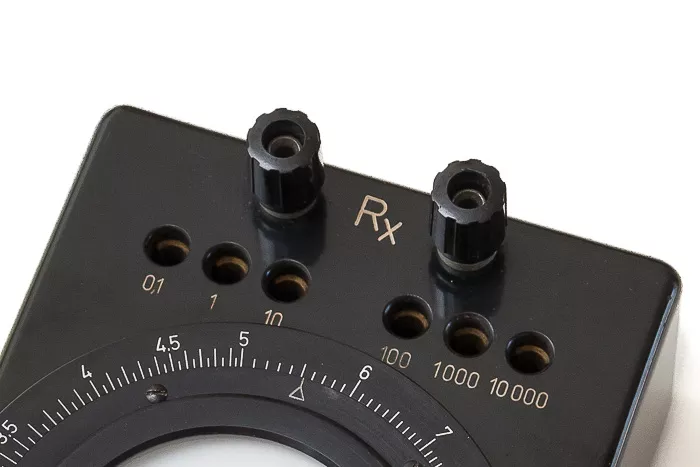
- Connect the resistor whose resistance is to be measured to the two terminals marked Rx.
- Use the plug selector to choose the multiplier appropriate to the expected resistance: insert the plug, which is missing in the photograph, into one of the sockets labelled 0.1 to 10,000.
- Press and hold the button marked T, then turn the adjustment ring until the galvanometer reads zero, indicating that the bridge is balanced.
- To lock the button down, press it fully and turn it clockwise.
- Read the scale at the index mark above the galvanometer. Multiply this reading by the selected multiplier to obtain the value of Rx.
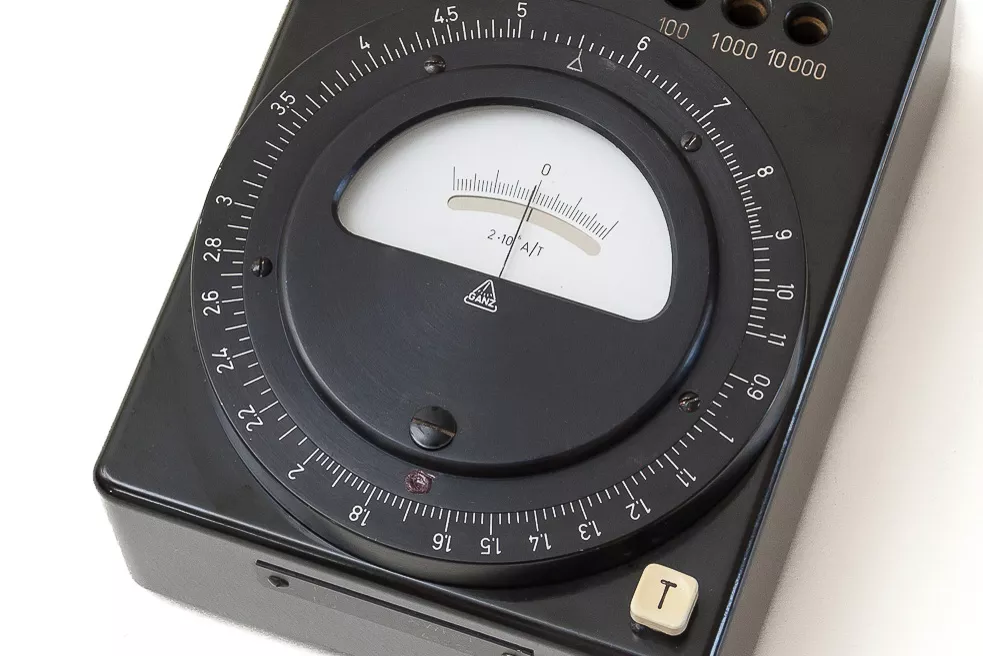
The selector socket and plug should be cleaned periodically. The leads used to connect Rx should be of good quality, adequately thick and clean.
When measuring low resistances, the resistance of the leads connecting Rx is added to the measured value, causing the instrument to read higher than the actual resistance. Recognising this source of error in low-resistance measurements, William Thomson, later Lord Kelvin, modified the design and developed the Kelvin double bridge. This uses a four-wire measurement method: two leads carry the current, while the other two connect the galvanometer to sense the voltage. Ganz also manufactured a Kelvin double bridge with the same physical design, the Ganz XTH–1. The most obvious difference is that it has four binding posts rather than two. Another significant difference is the power supply: the XWH–1 ran on a 4.5 V flat battery, whereas the XTH–1 required an external 2 V, 2 A supply.
The XTH–1 was designed to measure resistances too low for the XWH–1. Its measuring range extended from 0.0009 Ω to 1.1 Ω across three ranges, using multipliers of 0.001, 0.01 and 0.1. The internal circuitry of the two instruments differs substantially: the XTH–1 has two selector plugs, which must both be inserted in corresponding positions, and its adjustment ring operates two wirewound resistors simultaneously, rather than just one as in the XWH–1.
How the Wheatstone bridge works
The basic bridge circuit is shown in the diagram below. The measurement relies on comparing resistance values, a method that can provide considerable accuracy. The bridge arrangement also makes it insensitive to small fluctuations in the supply voltage. Battery E is connected across points A and C, so the voltage between these points equals the battery voltage.
Consider the case where the bridge is balanced, meaning that points B and D are at the same potential. Under these conditions, the sensitive galvanometer G reads zero, and no current flows between B and D. The same current flows through resistors R1 and R2:
The potential at D relative to C is therefore:
Similarly, for resistors R3 and Rx:
and
Since we have assumed that the bridge is balanced, UBC = UDC, giving:
Rearranging:
or
The balance condition is therefore:
Let R1 be a fixed resistor of known resistance, and R2 an adjustable wirewound slide-wire resistor. Let R3 also have a fixed, known resistance. Adjust R2 until the bridge is balanced. The resistance of Rx can then be determined from the scale fitted to R2:
Naturally, the bridge can only be balanced if Rx falls within a certain range. For example, if R3=R1, the bridge is balanced when Rx = R2, so R2 must be adjustable to exactly the same resistance as Rx. If R3=10·R1, the bridge is balanced when Rx = 10·R2; if R3=100·R1, it is balanced when Rx = 100·R2. If a switch allows R3 to be changed so that the ratio R3/R1 can be set to 0.1, 1.0, 10, 100, 1,000 or 10,000, the same slide-wire resistor R2 can be used for several different measuring ranges.
Applications
The Ganz XWH–1 Wheatstone bridge measures resistance, but the same principle can also be used to measure capacitive and inductive reactance, as well as impedance (see the Wien, Schering and Maxwell bridges). These measurements require an AC supply. Such bridge circuits can be used not only to test two-terminal networks, but also to measure the input parameters of two-port networks. Although the DC Wheatstone bridge is now rarely used to measure resistance, the bridge arrangement is also highly suitable for measuring non-electrical quantities—such as force, temperature and pressure—when a sensor is incorporated into one of its arms. Suitable sensors include photoresistors, thermistors, strain gauges and displacement transducers. In the age of digital multimeters, the Ganz XWH–1 is obsolete, but its measurement principle remains important two hundred years on.
Kedves András! Köszönet!, hogy felrakta a “Netre” a műszer használatát, leírásárt, a “kukából ” hoztam vissza a Magyar műszer gyártás egy értékes darabját! Hozzájutottam egy ilyen műszerhez, értékmentés ként meg szeretném tartani. Itt ismertem meg a működését. Így már eljutok a megvalósításhoz!
Kedves András!
Korrekt leírás, ezúton is köszönet érte.
Egy személyes kérésem lenne. A dugóról egy fotót és/vagy egy méretezett műszaki rajzot közkincsé tudnál tenni?
Üdvözlettel
Kedves Tamás!
Itt van DWG-ben:
https://drive.google.com/file/d/1oK7pYqGVZ35ZiA63KDzCJDBadAjsGoCf/view?usp=sharing
és STL-ben is:
https://drive.google.com/file/d/1LjBxfb-VNqfaIQc-2tbVNRsAlKlGlVCV/view?usp=sharing
Fényképek alapján készült, nem teljesen autentikus. A vezető rész a kúpos felületre ragasztott vastagabb réz fólia. Működik, de jobb lenne helyette tömör, esztergált sárgaréz kúpot használni.
Köszönöm a rajzokat.
A leíráshoz annyi kiegészítésem lenne, hogy a sima XWH (tehát a régebbi) műszernél a “T” nyomógombnak nincs köztes (érzéketlenebb) állása, de ugyanúgy rögzíthető ha teljes le van nyomva.
András!
Mennyiért lehet hozzájutni egy ilyen hibátlan műszerhez? Vennék egyet, de ha találok, szeretnék képben lenni az árat illetően.
Kedves Károly! Mivel használati értéke gyakorlatilag nincs, viszonyítani sem lehet mihez, alku tárgya. Állapottól függően 5-25 eFt. Nálunk idehaza 5-6 eFt-nál többet nem hiszem, hogy bárki megadna érte, de az eBay-en szerintem elmenne 25-ért is.