Mushroom foraging has its small but very important essentials, and one of the most important of these is a good basket. In this article, I present a practical, lightweight solution.
Mushroom picking is one of my passions. Without sounding immodest, I can say that I know mushrooms quite well. I learned a great deal from my grandmother and grandfather, with whom I roamed the forest as a child. Then, of course, I also learned on my own, from books, from my partner, who is a biologist, and from the late Professor Tibor Simon as well.
These days I am having trouble with mushrooms, because in our area recently—perhaps because of climate change, perhaps not—there has been very little rainfall. In my favorite mushroom-woodland area, over the past year I found only a few measly porcini mushrooms, yet at the time the dry ground was so cracked that I could fit my hand into the fissures.
A basket is an essential part of mushroom picking. A good mushroom basket is light, airy, and comfortable to carry. The best choice is a traditional woven willow basket, because it allows the mushrooms to breathe and prevents them from becoming damp and stuffy. It is not a good idea to collect mushrooms in a plastic bag, because they will sweat and spoil. If necessary, a canvas bag will do, but mushrooms are easily crushed in it.
The problem with a wicker basket comes when you do not find any mushrooms—which, around here, has happened quite often lately—and would rather just go hiking. A wicker basket has to be carried by hand; you cannot pack it into a backpack. Carrying it around for nothing is inconvenient and annoying. I wanted a basket that would be light, inexpensive, and small enough to fit into a backpack when folded. It does not have to be large; if it can hold enough mushrooms for a Sunday lunch, that is more than sufficient. I could not find a suitable ready-made one, so I designed one in Autodesk Fusion 360.
Materials
Items to buy:
- 2 pcs, 200 mm long, ∅20 mm PVC electrical insulating conduit (Gewiss RK9 MÜ II)
- 2 pcs, 80 mm long, ∅20 mm PVC electrical insulating conduit (Gewiss RK9 MÜ II)
- 4 pcs 90-degree elbows (Gewiss DX40120)
- 4 pcs ∅4 × 2 × 200 mm carbon rod
- 2 pcs M3 or M4 screws + nuts
- 1 pc 310 × 190 mm foamed PVC sheet (bottom plate, corners rounded to a 55 mm radius)
- approx. 1.5 meters of 4 mm braided polypropylene rope
- approx. 0.6 meters of 20 mm wide hook-and-loop tape
3D-printed parts:
- 1 pc handle grip
- 4 pcs hanger
- 4 pcs hinge
- 2 pcs spacer
- 2 pcs socket
Making the Frame
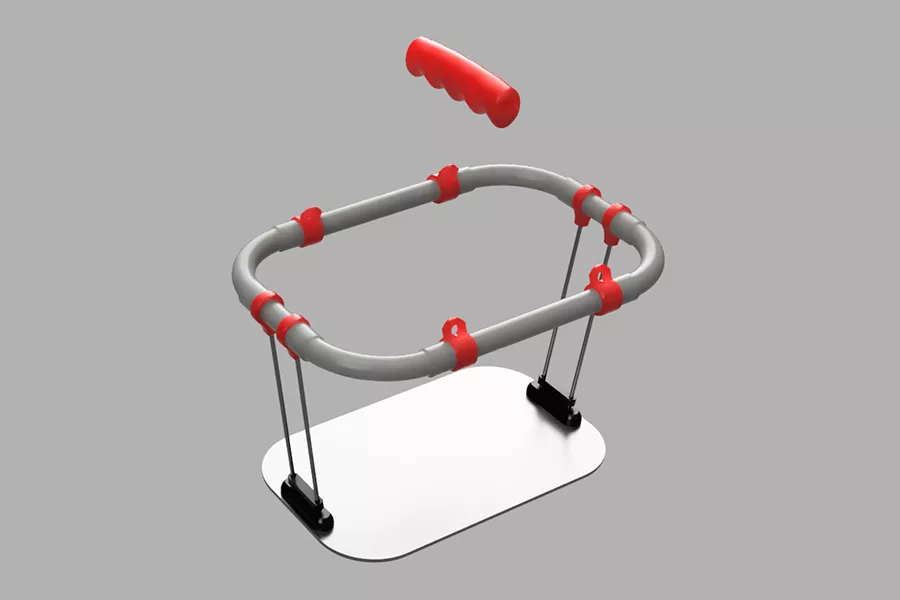
The upper frame of the basket is assembled from electrical insulating conduit and matching elbow fittings, then glued together with PVC adhesive. The bottom of the basket is made from 4 mm foamed PVC sheet. In the open position, it is supported by 4 carbon rods, which are glued into the holes of 4 hinges attached to the frame. Glue one spacer onto each pair of support rods at the two ends of the basket, so that the ends of the rods protrude about 5–7 mm below. These protruding ends fit into the holes in the sockets. The sockets are glued to the bottom plate with PVC adhesive.
Before gluing the frame together, print the hinge and hanger elements and thread them onto the pipes.
Sewing the Basket
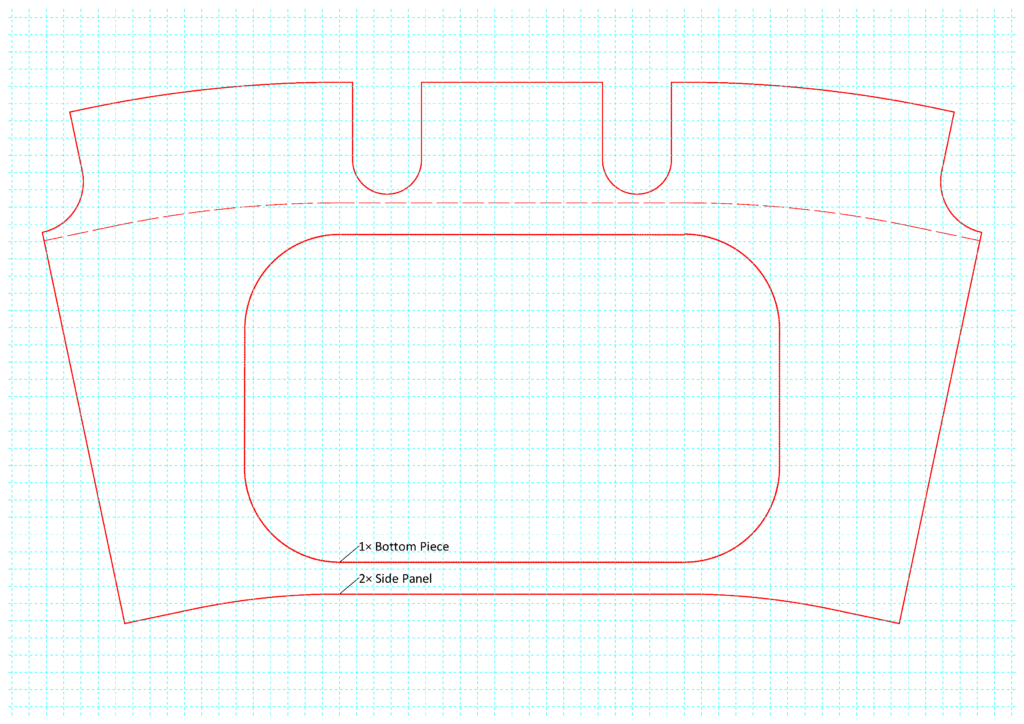
The basket is made from a coarse, strong, breathable canvas fabric that is easy to wash. Cut out the bottom and the two sides separately according to the attached pattern, paying attention to the grain direction. Finish the edges of the pieces on a sewing machine with a lockstitch or overlock stitch, then sew the parts together inside out using a triple straight stitch (reinforced stitch). Turn it right side out and test it on the frame. If everything is in order, sew the hook-and-loop tape pieces onto the upper tabs.
Assembly
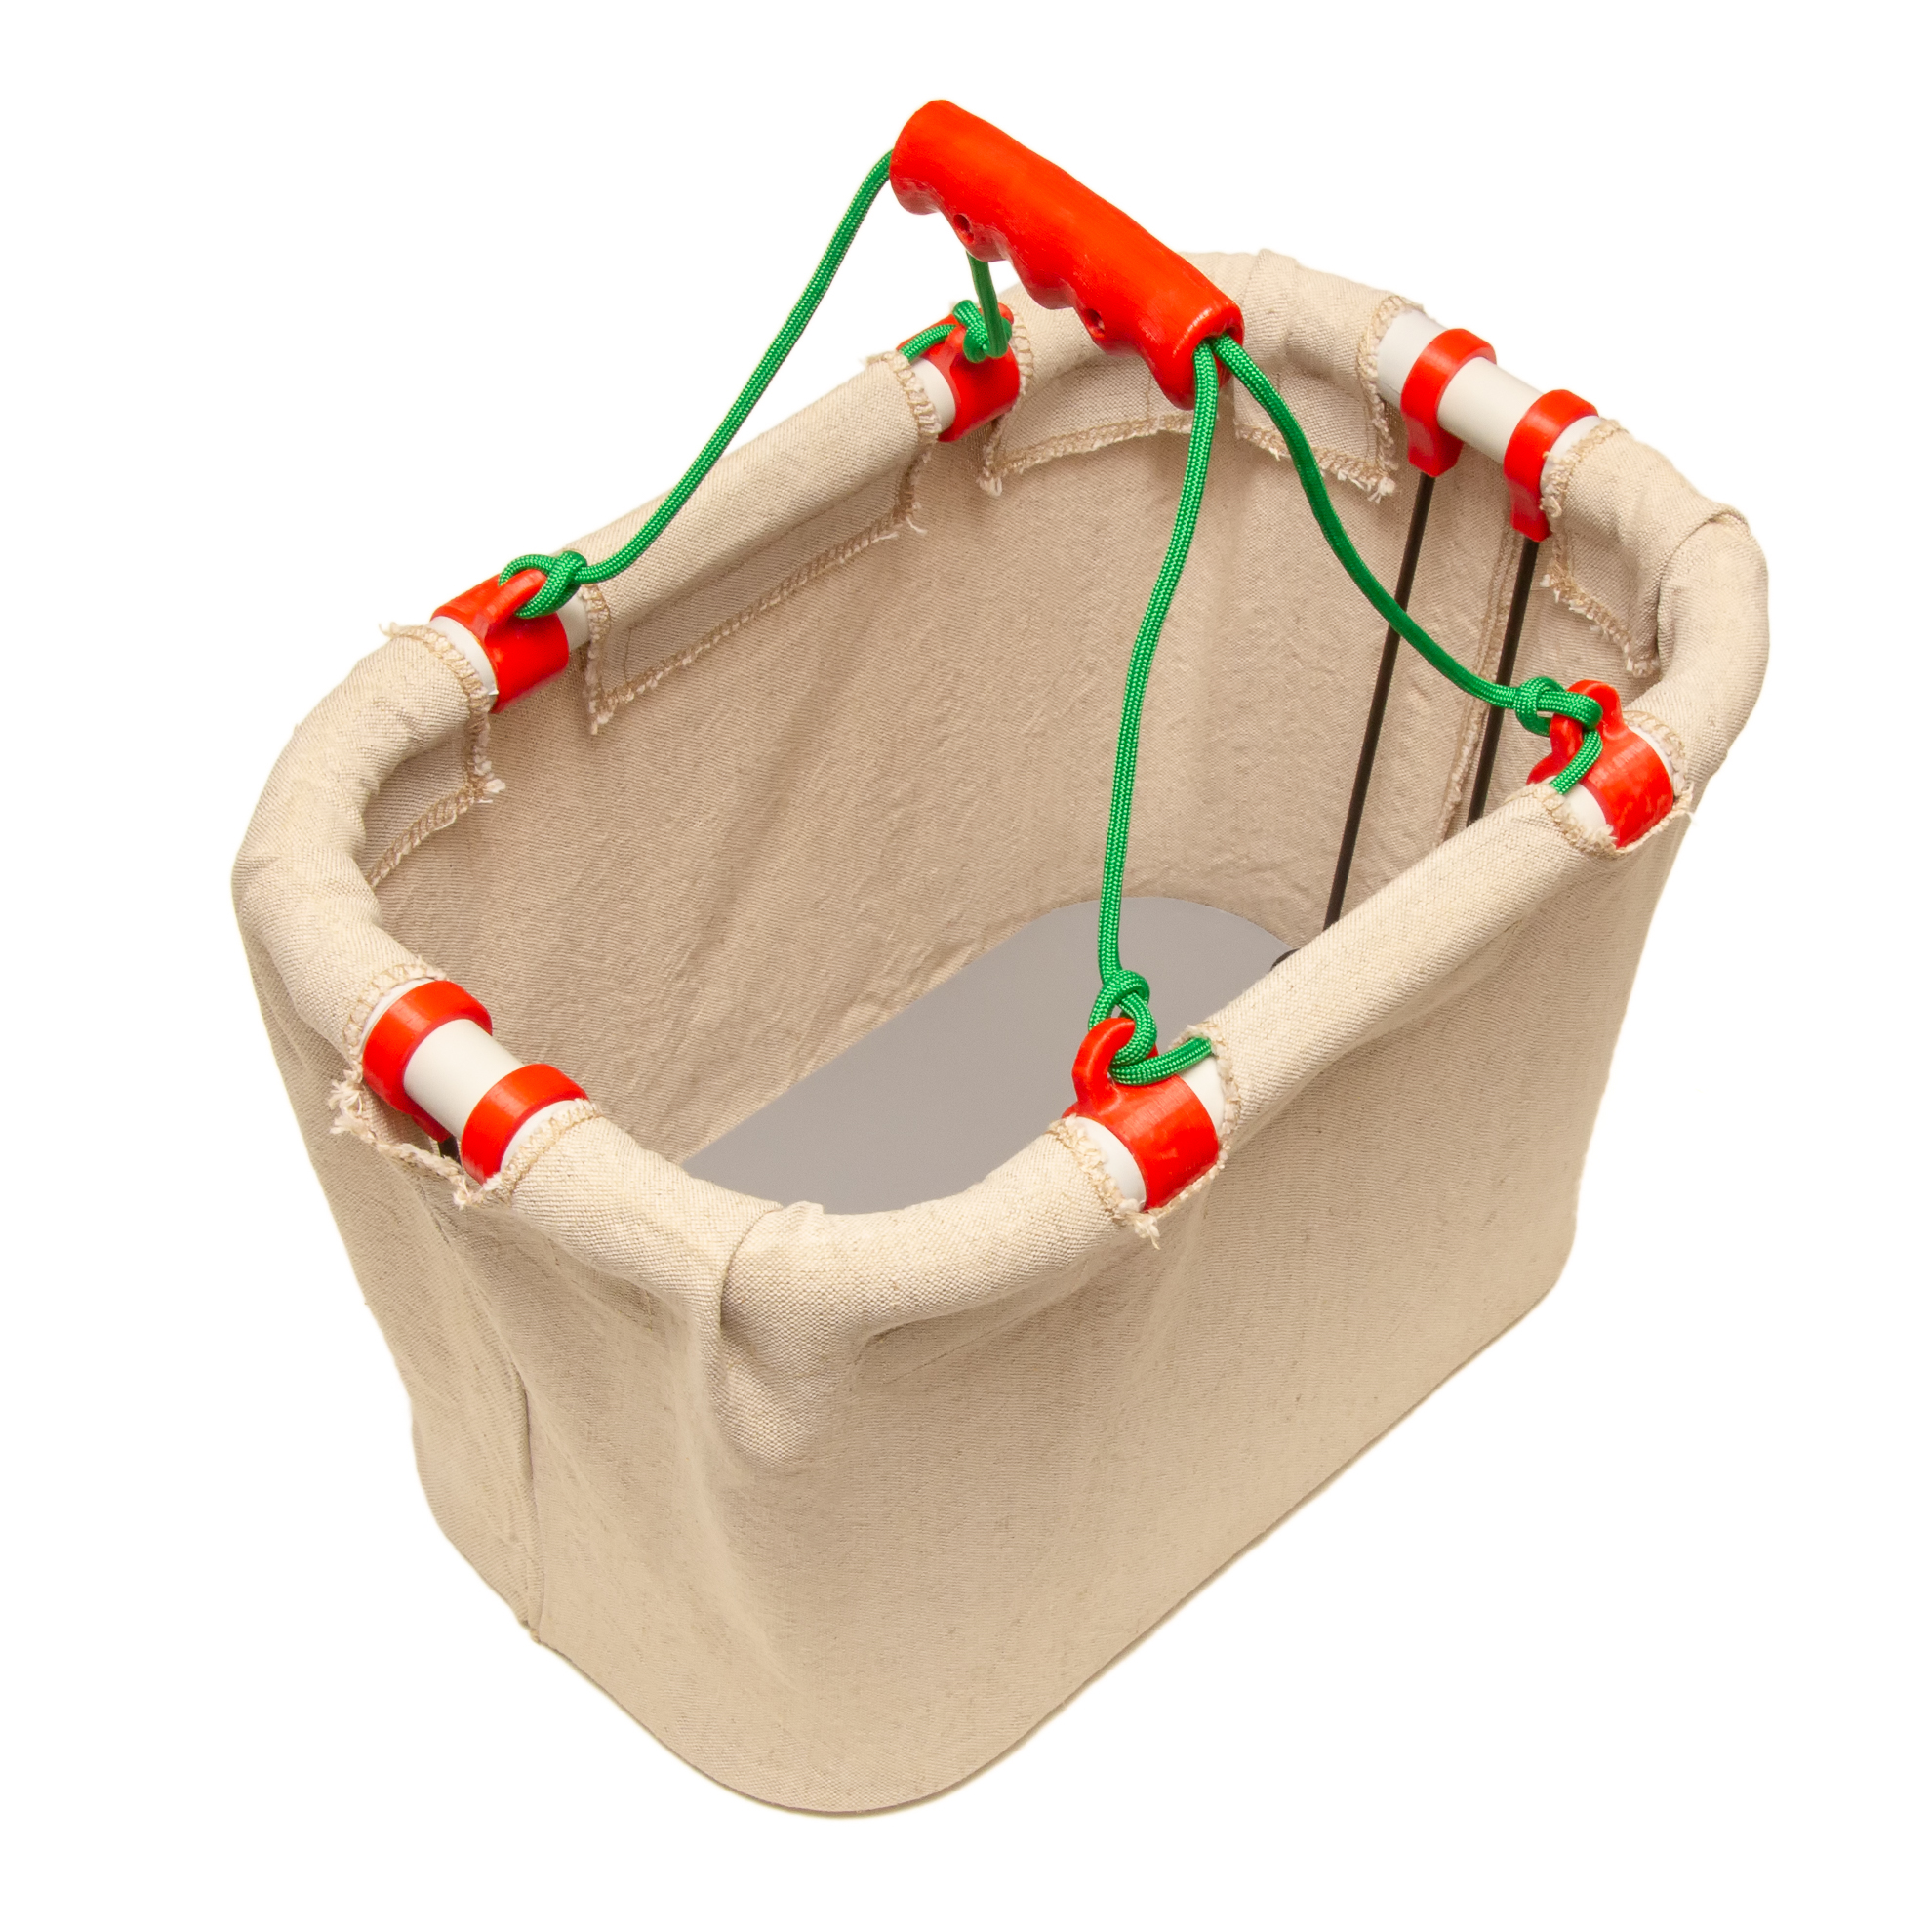
Set up the basket frame. Stretch the canvas over it and fasten it to the frame with the tabs. Thread the rope through the holes in the hinges so that you get two loops.
I am also providing child-size and adult-size handle grips for the basket. The reason there is a cavity inside the handle grip is that this is where the knot joining the two ends of the rope will sit. The handle grip consists of two identical parts, which are fastened together with screws and nuts after the rope has been threaded through. The child-size version requires M3 screws, while the adult version requires M4 screws.
If your backpack can hold a laptop, it can also hold this basket when folded. Happy mushroom picking!
The 3D-printable parts and the downloadable files are available on Printables.com: https://www.printables.com/model/1691212-foldable-mushroom-picking-basket